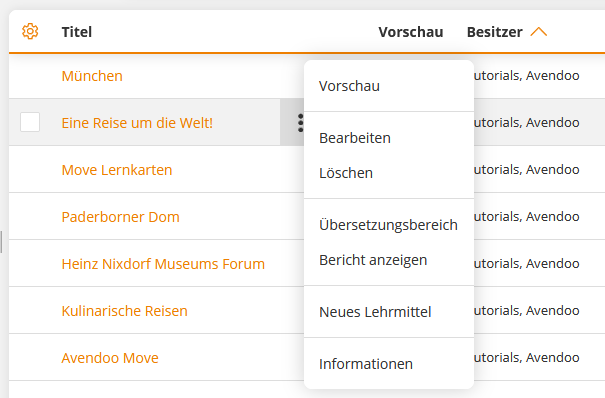
Context menu
The context menu allows you to perform context-sensitive actions for a specific object. In the list view, it appears directly next to the respective entry – identifiable by the three-dot icon on the right edge of the row. As a central control element, it supports the quick and targeted editing of individual objects without you having to leave the list view. This facilitates navigation and reduces clicks.
Basic Functions
Preview
If you select the menu item Preview in the context menu of the respective object, the object opens from the user’s perspective.
Edit
Using the command Edit, you access the editing view (wizard) of the selected object.
Delete
Clicking Delete opens a dialog box where you will be asked to confirm the deletion process.
Translation area
If you select the menu item Translation area in the context menu of the respective course, the Translation area window opens. You can create translations in different languages by clicking the Do a translation button.
Show report
In some context menus, you have the option to directly access a report for the object in question. A dialog box opens, offering you the reports available for this object. Select a report to configure and retrieve it in the next step.
New . . . . .
In some context menus, you have the option to directly create a new object (e.g., in New course activation, New knowledge test)
Information
If you select the menu item Information in the context menu of the respective object, the Information dialog box opens with the tabs General, Use, History, and Security.
Details on the Information dialog box.
Further Functions
The following functions are found exclusively in the context menus of individual objects.
Course activation → Notification to course participants
If you select the menu item Notification to course participants in the context menu of the respective course activation, the Notification to course participants window opens with the selected object. Select a recipient group and a notification template, then send the notification.
Course activation → Change status
If you select the menu item Change status in the context menu of the respective course activation, the Change status window opens. Select the desired status under New status and confirm with the Change status button.
Course → Edit associated course activations
Here, the selection and editing of associated course activations opens as a mass editing function.
Course → Create / Remove participant rule
If you select the menu item Create participant rule in the context menu of the respective course, the window for creating a participant rule for multiple course activations opens. These can be deleted again via the Remove participant rule option.
User management → Registered . . . . .
If you select the menu item Course activations, Training plans, Events for which the user is registered, or Registered prospect lists in the context menu of the respective user, the view switches to the overview of the selected objects in which the respective user is registered.
User management → Qualification profile comparison
If you select the menu item Qualification profile comparison in the context menu of the respective user, a dialog box opens. In it, you can select the desired qualification profile from a drop-down field, and it will show you to what extent the selected user fulfills it.
User management → Register/Login as user
If you select the menu item Log in as User in the context menu of the respective user, you can log in as the selected user. For this, you need a reason and the consent of the selected user.
Provider → Synchronization
On the Provider Synchronization tab, you will find the synchronization data for your Microsoft Viva Learning connection.
- Enter the Learning Provider VIVA ID.
- Under Synchronization, you have the option to create, update, and remove the Learning Provider for your Microsoft Viva Learning environment. You can also reset the authentication.
Group administration → Archive
If you select the menu item Archive in the context menu of the respective community group, the Archive window opens with the selected object. You can archive the selected object using the Archive button.